(FYI: I am not a professional mechanic so please do this at your own risk!)
After owning our Airstream for 5 years, I finally decided that it might be a good idea for me to learn to repack my own bearings. It is one of the chores that I have always wanted to learn but never committed enough time and effort to figure it out. During our trip through Wyoming in 2013, our friends Josh and Jessa lost a bearing and had a wheel come apart. Fortunately no other damage was done. We managed to make the repair ourselves on the road and in the meantime, learned a thing or two about wheel bearing maintenance.
First off, this is something that needs to be done for preventive purposes. You will not have any indications of bearing failure until it is catastrophic. The rule of thumb is once-a-year or every 10,000 miles. Doing it more often will not hurt. If you are not up to doing this job yourself, this can easily be done by any trailer or RV repair shop or even a mobile RV repair man. I decided that learning to do this myself not only will save me money, it will also give me a peace of mind to know that no one cut corners or hurried through the job as it is a serious matter of safety as our family travels around the country.
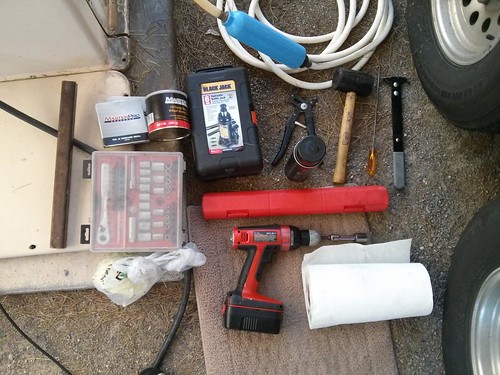
This can be done pretty much anywhere you can find a level concrete or asphalt surface. Since you will be removing tires and wheels off of your trailer, it is not recommended for you to do this on an incline or soft surfaces. Other than that, a minimal set of tools are needed:
- Socket Set and Breaker Bar
- Adjustable wrench
- Small flat-head screw driver
- Hydraulic jack
- Grease seal puller
- Rubber mallet
- Torque wrench
- Paper towels
Optional Tool:
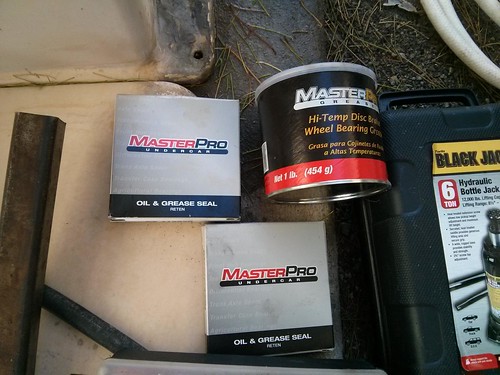
Some of these parts are optional to replace while performing this job but you will definitely need these following items. Make sure you look up exactly what size and part number you need for your axle so you have everything you need before getting started:
- New grease seals (one per wheel)
- High temperature bearing grease
- New cotter pins (one per wheel)
- Brake Cleaner (To clean off the electric brakes of its dust while you are in there. Not critical but nice to do.)
Optional items as needed:
- New grease caps
- New inner and outer races (If needed, this is ideally replaced by a repair shop with a hydraulic press)
- New inner and outer bearings (One of each per wheel)
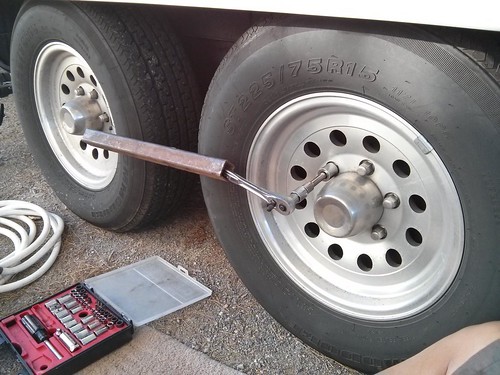
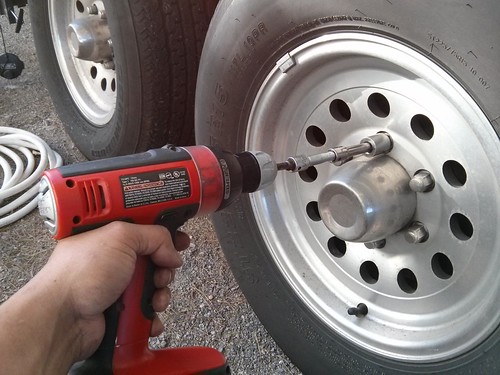
Before you do anything, choose a side you are going to start on and chock up the wheels on the opposite side of the trailer so doesn’t move on you. Pick a wheel to start and loosen the lug nuts with your tire iron or socket and breaker bar.
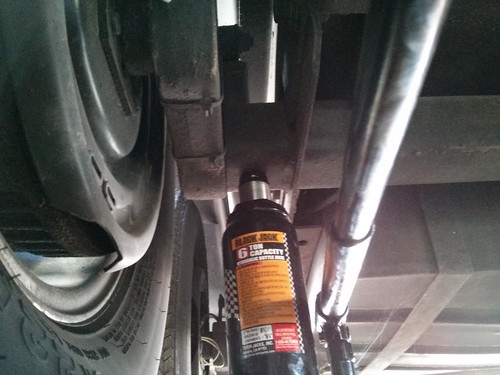
Once the lug nuts are loose, jack up the axle of the wheel you are working on. Alternatively, you can hitch up and roll the wheels on the other axle up some leveling blocks until the wheel you are working on is off of the ground. On mine, it takes 4 lynx leveling blocks to make that happen.
Once your wheel is off the ground, completely remove all of the lug nuts and remove the wheel. So far, you are doing the exact same thing as if you were just changing a tire.

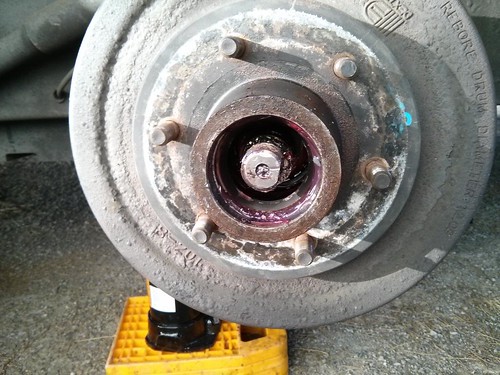
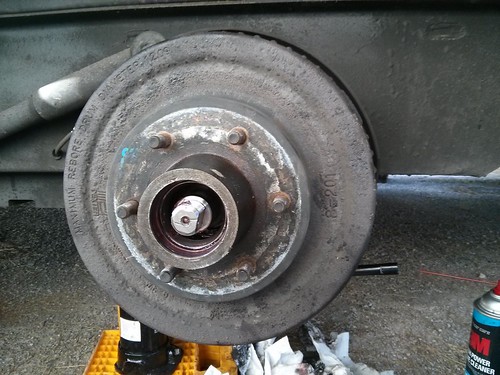
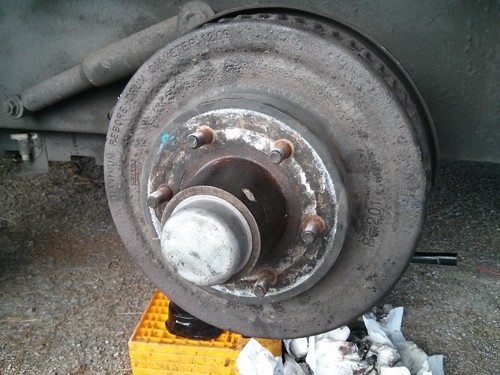
With the wheel off, you will see the hub assembly. Most of these items will be coming off and we will start with the grease cap.
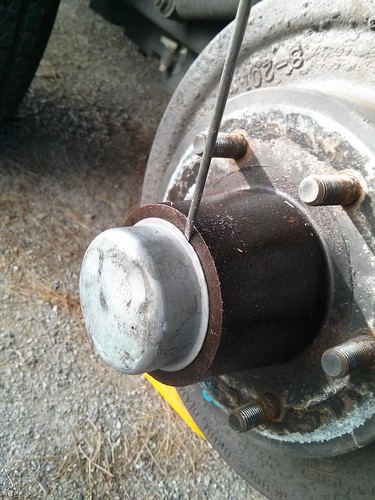
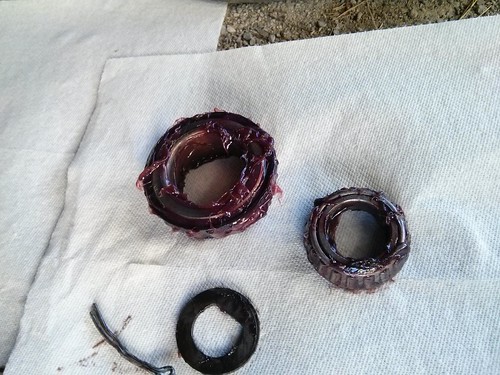
Using a small flat-head screw driver, pry the grease cap off of the end of the axle. Work around it evenly until you starts to see the gap widening.
Without damaging the grease cap, remove it form the end of the axle. It should come off without much hassle. If you notice any damage or if you suspect that the grease cap will not stay in when put back on, you will need to replace it with a new one.
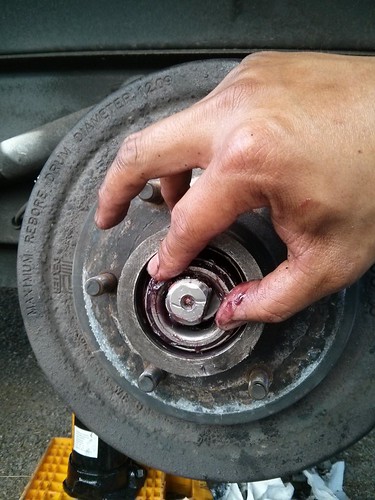
With the stub axle exposed, pry off the cotter pin that holds the castle nut on the threaded portion of the axle.
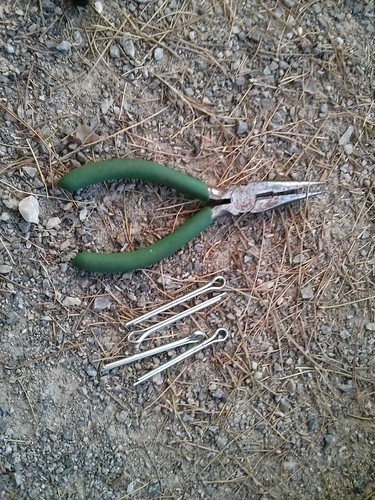
You might be able to salvage the cotter pin but over time the metal will be fatigued. It is best to buy 4 new cotter pins and replace them each time.
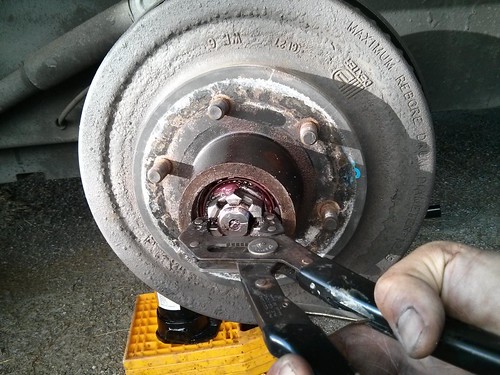
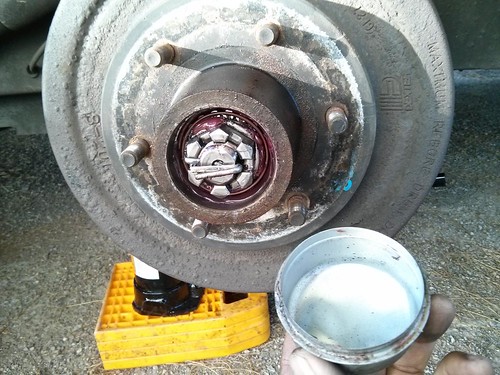
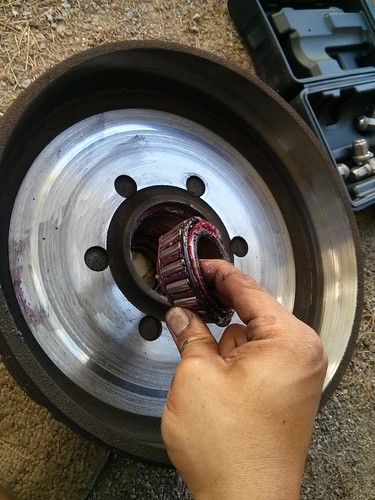
With the cotter pin removed, the castle nut should come off pretty easily. It should not be on very tight. You might need to use a wrench initially but mostly you should be able to work it off by hand. As you can tell, mine still has lots of grease in there so it came off easily.
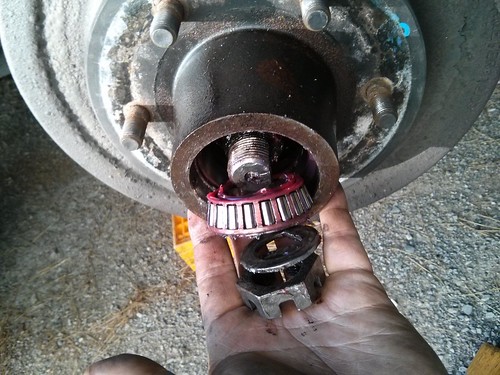
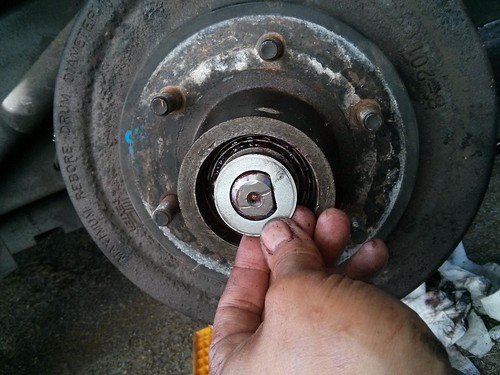
With the castle nut off, the washer and the outer bearing should come right off. You can see that the bearing has a tapered shape as it is held in by the washer and castle nut. That tapered shape is how the hub is held on to the axle. If that outer bearing fails and wears away, your entire wheel will no longer be held to the axle and will freely move away from the trailer. That failure is usually due to loss of grease in the bearing and extreme temperatures to literally wear the bearing down to metal dust.
With the outer bearing out, set them aside on a clean surface. You don’t want any foreign objects to stick to these.
This is what it looks like with the outer bearing out. Now the hub can easily slide off of the axle.
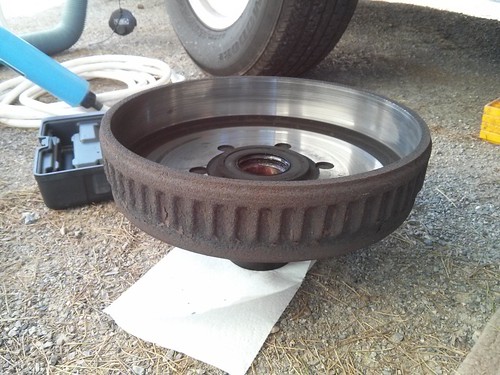
The hub is also the brake drum that the brake shoes push against to slow the trailer down. You can see on the inside that there are polished surfaces. That is where the shoes and magnets make contact. Set the hub/drum aside for the moment and we will turn our attention back to the axle.

Here is the axle with the electric brake assembly still attached. We will not need to take this down any further unless you need to replace your brakes. This is a good time to check their serviceability.
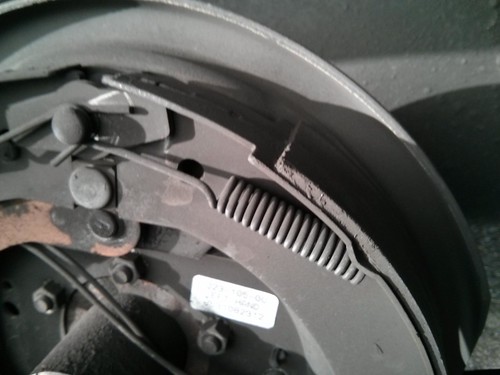
Right there on the outside is one of the brake shoes for this electric brake. There are 2 per wheel on opposite sides of the assembly. Looks like I have a fair amount of shoes left.
This right here is the magnet that actuates the brakes. When your brake controller applies voltage to your electric brakes, the magnet sticks to the hub which causes the brake shoes to spread against the inner surface of the drum. The stronger the voltage, the harder the magnet pulls on the hub which applies more brake pressure against the drum. If you need to change your brakes, it is often best to order the entire electric brake assembly rather than replacing its parts. Since I am not replacing my brakes at this moment, we will not go much more into that.
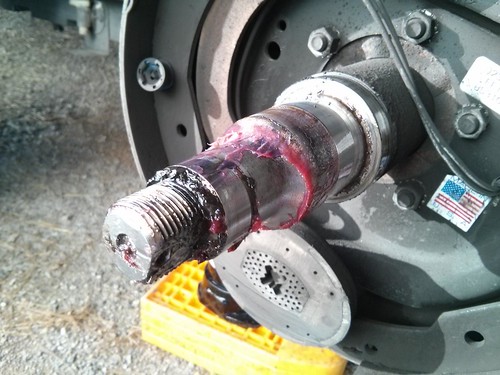
Here is the stub axle. Give it a good wipe down with some paper towels and inspect it for wear. If you do not let your bearings go too long without repacking, it should be in good shape. You are looking for any abnormal marring on the axle surface.
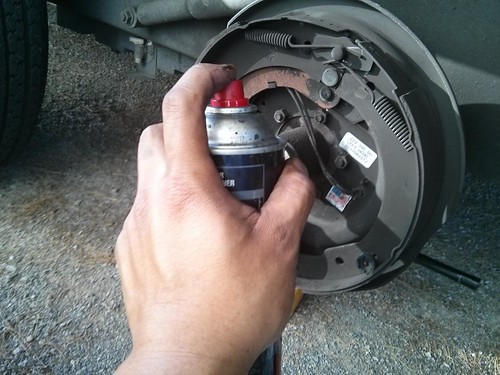
While I am in there, I like to give my brakes a good cleaning with some brake cleaner. Once that’s done, we can turn our attention back to the hub.
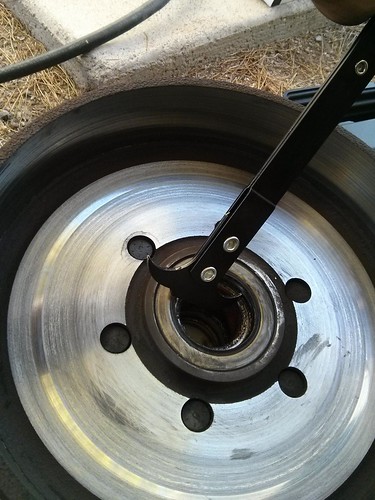
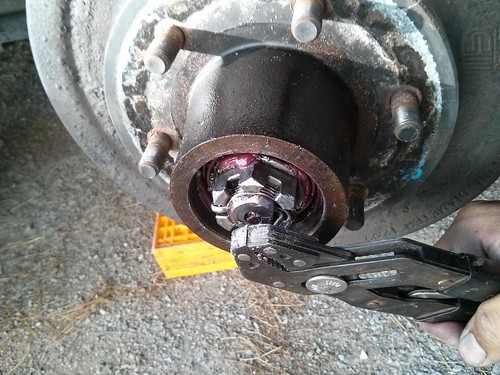
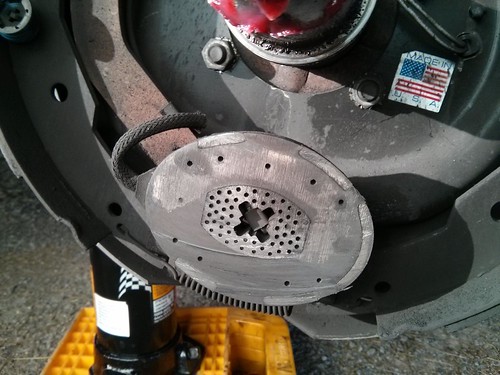
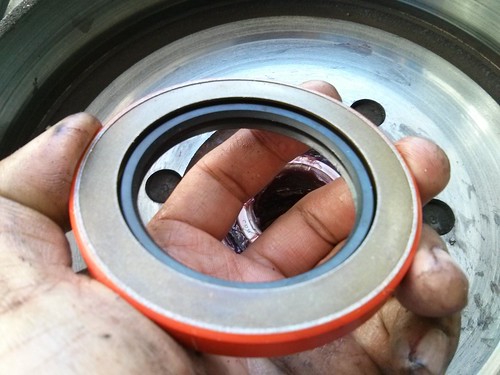
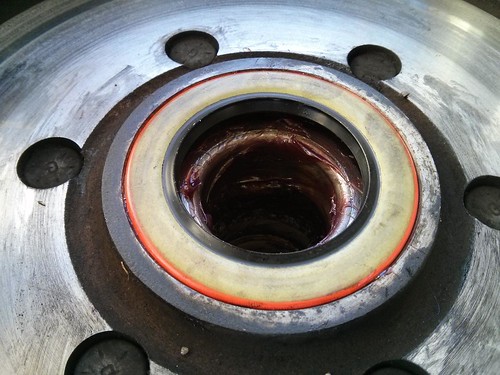
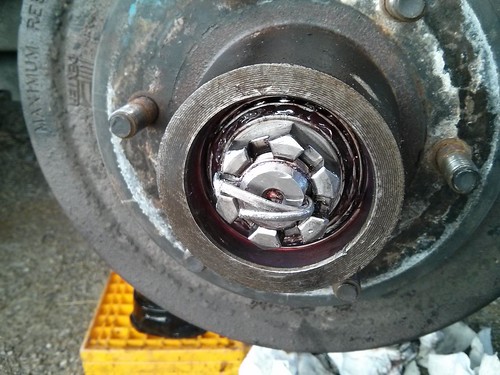
Here is the inside of the hub. This tool is called a grease seal puller. You can buy this at pretty much any auto parts store. You are going to need something that can pull out the old grease seals without damaging the bearings that are inside and this is the tool. This seal is what prevents grease from leaking out from the inside of the hub while the grease cap out the outside that we pried off earlier does the same job on the other end. Most bearing failures happen when one of the two fail and grease seeps away causing the bearings to overheat.
Slowly work all the way around until the seal comes off. Chances are, you are not going to reuse the old seal. You can tell the little dimples the seal puller made while I was removing it.
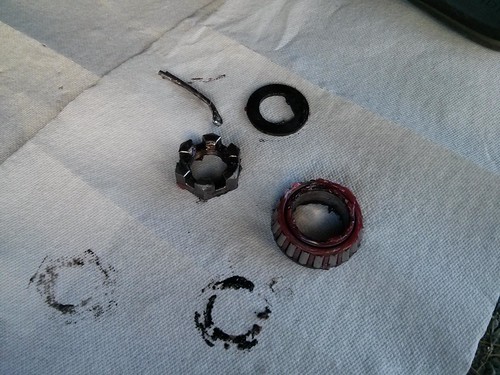
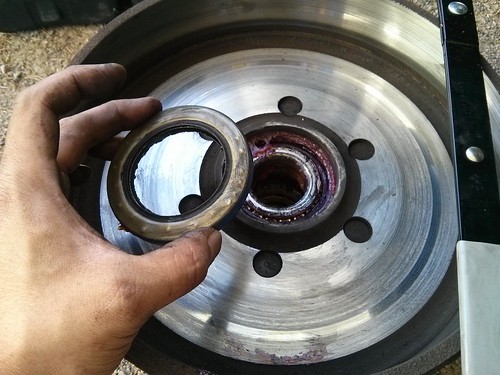
With the grease seal out, you can pull out the inner bearing. Again, my bearing still has lots of grease in it which tells me I did not wait too long to repack it.
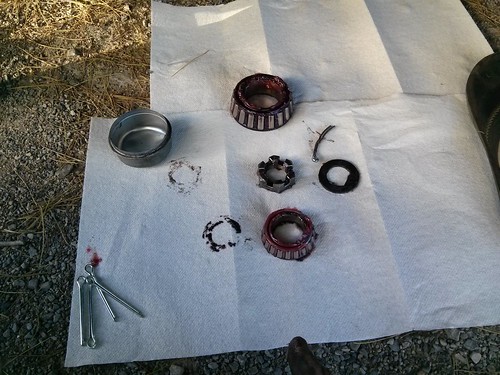
With the bearings out, set them on a clean surface. We will pack these full of new grease in a minute and reinstall them.
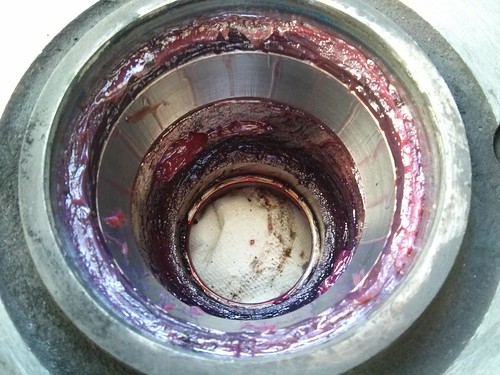
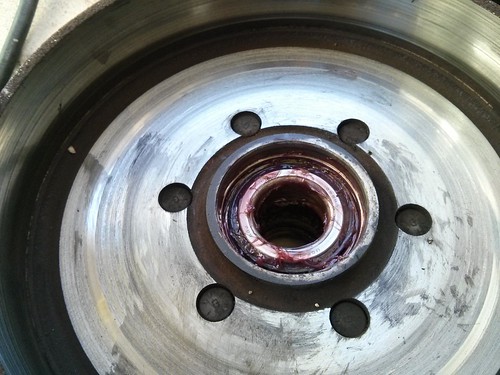
Take a look at the interior of the hub from the inner-bearing side. Give it a good wipe with a paper towel to make sure there aren’t any foreign objects like metal shavings or rocks that got in there. You might be able to tell that on the inside of the hub, there are 2 rings of shiny metal that the bearings ride against. Those are called ‘races’. These races are made of harden steel. They are the contact surfaces of the hub against the fast spinning bearings when the trailer is moving. They don’t need to be replaced if the surfaces are smooth like mine. Sometimes if they have been damaged, you will need to replace them. Damage can happen when foreign objects make its way inside this space and gets cause between the bearings and races. That typically means you waited too long and the seal failed to let objects in and grease out. That is a job that requires a hydraulic press. If you see significant wear on those races, bring the hubs to an automotive repair shop with new sets of races and ask them to remove the old ones and press in the new ones. It should be about an hour of work so it should only cost you their minimum labor charge. Most of the time, you don’t need to worry about them.
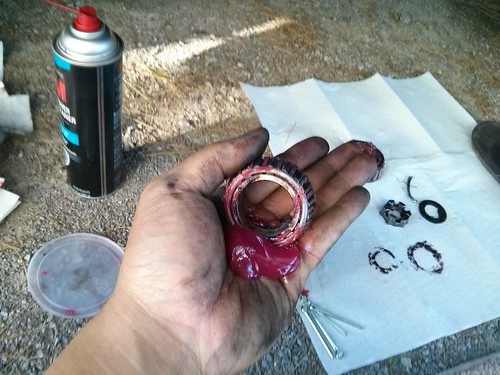
With the inside of the hub wiped clean, now we can actually do the repacking of the bearings. Some people like to just replace the bearings with new ones each time but that is really not necessary. Just like the races, the bearings can last many, many years if they are maintained regularly. High quality bearings can be expensive but should also last a long time. To repack them, wipe the old grease off of the surface and reapply with new grease. You will want to work as much grease into these bearings as you can. That means you want all the little voids outside and inside of the bearing full of new grease. Put a glob of high-temperature bearing grease in the middle of your hand and just start to roll and push each bearing against your palm until you feel that the bearing is saturated. Do it for as long as you feel it is necessary. You can also use a bearing packer to do this job if you don’t think you can do it well enough by hand. It is a handy tool to have if you think you will be doing this a lot.
Each wheel has 2 bearings so in total we will be packing 8 bearings out of our 4 wheels in a double axle trailer.

Here is the cleaned races inside the hub. Some people recommend that it doesn’t hurt to grease up the races and interior of the hub as well. The idea is that the grease seal and grease cap will not allow any grease to escape and foreign objects to get in so it should not matter. Do that if it makes you feel better.

Drop the inner bearing in the same way you took it out. It should fit in place so each bearing rides flat against the race.
Here is the inner bearing back in place. It should drop right in without any trouble and it will be held in place by the new grease seal until the wheel is back on the axle.
Here is the new grease seal. Pay attention to how the old one came out. The new one will need to go in the same way. They are NOT reversible.
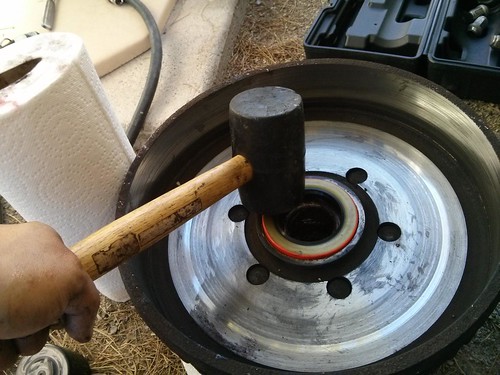
Use a rubber mallet to gently tap all the way around to seat the seal in place.
Here is the new grease seal installed over the inner bearing. It should be a snug, flush fit.
Now we just reverse the process and put the hub back on the axle.
Once the hub is back on, slide in the outer bearing. Pay attention to how the bearing goes in. The tapered side should go in first.
Then the washer will fit over the bearing before the castle nut goes back on. The flat spot on the washer should fit perfect on the flat part of the axle so the washer stays in place while underway.
Now thread the castle nut back on the axle. The nut should go on just hand tight. Once it is in all they way, try to wiggle the hub side to side, back and forth with both hands while it is on the axle. It should not slide around too much. A good rule of thumb here is to snug it all the day down by hand until there is no play in the axle and then back it off about 1/8 turn or to the previous slot in the castle nut for the cotter pin to go in. Spin the hub around the axle by hand several turns to make sure the bearings are seated properly against the races. Check after several spins to make sure it moves smoothly with no feeling of grit and there isn’t too much wiggling back and forth. Repeat this process a couple of times until the hub spins and moves consistently after each test. Take your cotter pin and insert it into the hole in the end of the axle and it will hold the castle nut in place and prevent it from backing out.
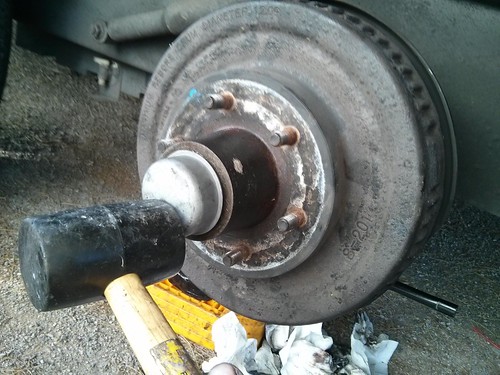
Take your grease cap and tap it back on with a rubber mallet. Again, this should go back on snugly. If it feels like it can come off on its own while traveling, considering replacing it. The last thing you need is this cap coming off and all of the grease inside the bearings spinning out.
That is it! Now you are back to just putting the tire back on. From here on out, it is again just like if you were changing a tire.
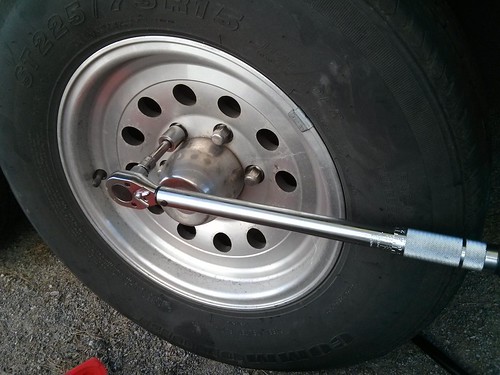
Once your tire is back on, hand snug the lug nuts before lowering the trailer from the jack. Once the tire is back on the ground, snug your lug nuts up to the specified torque settings. Now just repeat this 3 more times and you are done. Just as with any tire change, check your lug nuts to make sure they are still properly torqued down after 25 miles. It doesn’t hurt to check again at 100 miles just to be safe.
I hope this has help some of you at least in learning how this process is done. It is time consuming especially if you have 2 or more axles. It probably takes me about 2-3 hours to do the entire job. If you have someone you trust to be able to do a good job then by all means have a professional do it. If you are like me, sometimes this needs to be done while on the road, I prefer to know that I am responsible in doing the best possible job to ensure my family is safe on the road. I have heard from at least two different full time travelers who have had axle failures that the issue ultimately came down to issues in the last bearing packing job. Please feel free to contact us if you have any questions or suggestions about how to repack your own bearings. Happy travels!
dan
5 Comments
Oliver · July 27, 2020 at 8:30 am
This is awesome. Thank you for building this!
Burt · November 18, 2025 at 6:17 pm
Just about to take this job on in our new to us airstream. Thanks for the great roadmap to doing this job.
How to Repack Your Axle Bearings. | Mali Mish - An Airstream Travel Blog · March 19, 2014 at 11:08 pm
[…] How to Repack Axle Bearings. […]
Mechanical issues in month two | Boondock or Bust! · August 24, 2015 at 12:57 am
[…] do all the hubs. To get a very concise description you can check out Dan from Malimish.com on the blog post he did regarding this. He does an excellent job covering it all. And Mark agrees with him that […]
How to Repack Your Axle Bearings. – Mali Mish · October 8, 2020 at 6:33 am
[…] and done well by myself. I documented the job on one of the wheels to illustrate to you my process. Click here to read all about it. […]